*Review HOW TO USE E-Z MOUNT BRACKET SYSTEM and pre-assemble your brackets.
Determine the best location for your fenders to be mounted and temporarily block or support the fender into desired position. (we suggest using a 1 x 4 x 12" strip of wood across the top of tires.) Using shims where necessary, center the fender on the blocks, making sure the fender is level with the frame.
(NOTE: It is important to keep the fender an equal distance from the frame. Periodically check the distance, front and rear, by measuring from the outside edge of the fender to the frame.)
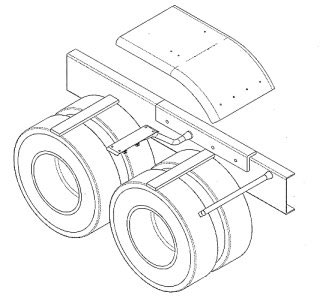
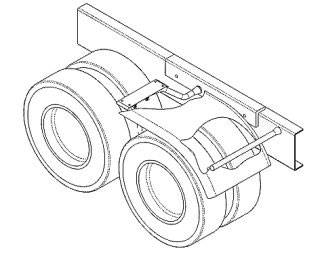
It is helpful to install your center support (rear) bracket first on half-fenders. Place the E-Z Mount Center Support Bracket into the predetermined frame hole. (NOTE: If possible utilize the ftfth wheel rail hole.) Rotate the bracket in an upward position or slightly toward rear of fender. (NOTE: If you are using a 8" or 10" bracket do not mount bracket at an angle greater than 45 degrees. If you are mounting either bracket at an angle greater than 45 degrees, YOU MUST USE the next size shorter bracket.) Do not drill fender holes yet - use a vice grip type clamp to hold the fender.
Using the E-Z Mount Outside Fender Bracket, (single stud or post mount) install the bracket either into the predetermined hole in frame or the post mount on the suspension. If you are using a single stud mount, tighten the Nyloc nut so the bracket rotates firmly. If you are using the post mount, secure the clamp so the bracket rotates firmly. We suggest that you mount your front bracket within a range of 12" to 16" from the bottom edge of the fender to the center of the bracket arm. It is important that you do not leave too much fender below your bracket - as the air from driving or passing other trucks could potentially cause the bottom of the fender to flex and the radius of the fender to bend or crack.
With the bracket mounted firmly to the frame, hold the fender up to the bracket and insert the first and fourth grommets in place between the fender and bracket. Mark the fender at the outside end of bracket, and along the top of the first and fourth grommets. Remove the fender from the blocks and set on the floor. Hold the 1 1/2" x 19 3/4" backing plate across fender. Line up the top of the backing plate with the marks you made along the first and fourth grommets and the outside end of the backing plate with the marks you made at the outside end of the bracket.
(NOTE: It is important that the marks are equal distance from the bottom edge of the fender, this will ensure that the bracket is mounted straight.)
Using your backing plate as a template, drill the four holes in the fender. (NOTE: Remember to only drill the four holes that line up with the bolt holes in your bracket. The other holes are for the tabs on the tab lockwashers, to keep the 3/8" by 1 3/4" bolts from loosening when the job is complete.) It is helpful to insert each 3/8" bolt into each hole as they are being drilled. This will ensure the plate remains lined up property. After you have drilled the four holes in your fender we suggest that you enlarge them to 13/32". This will allow for adjustment when bolting the fender to the bracket. After you have enlarged the four holes in fender, place the fender back onto the blocks and bolt the fender to bracket. Be sure to put grommets between fender and brackets. Using the backing plate and tab lockwashers under the fender, torque the 3/8" x 1 3/4" bolts to 10 ft/lbs.
(NOTE: Remember to bend the tabs on the tab lockwashers down against the hex head of the 3/8" bolts holding the backing plate.)
Before drilling and bolting the center support (rear) bracket, adjust the bracket plate in or out across the width of the fender so it is centered. Drill the holes into the fender (The fender does not need to be removed.) Install stainless buttonhead bolts through the fender and bracket plate. When you have completed mounting center support (rear) bracket, tighten all Nyloc nuts.
Torque 5/8" Nyloc nuts to 150 ft/lbs.
Replace the air in the suspension. Mounting is complete.
|
 |